How to Check Radio Button using jQuery
Radio button are special type of input fields that are used to select only one option from the given list of options. In this tutorial, we will learn how to check radio button using jQuery.
There are 2 ways by which you can check radio button using jQuery:
- Using
prop()method - Using
attr()method
Let's see both the methods one by one.
1. Check Radio Button using prop() method
The prop() is an element method that is used to set or return properties and values of the selected elements.
It takes two parameters:
- property: The property to set.
- value: The value to set for the property.
To check a radio button, we need to set the checked property of the radio button to true.
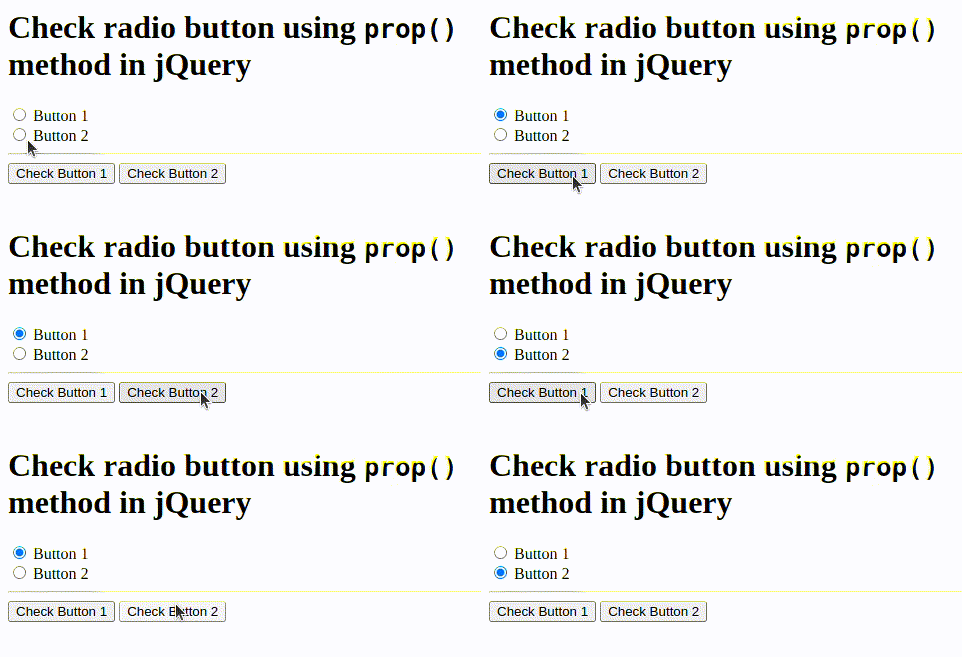
Here is a working example of checking radio button using prop() method:
Example
<!DOCTYPE html>
<html>

<head>
  <meta charset="UTF-8">
  <title>jQuery radio button checked: Example 1</title>
</head>

<body>
  <h1>Check radio button using <code>prop()</code> method in jQuery</h1>
  <input type="radio" name="btn1" value="1"> Button 1<br>
  <input type="radio" name="btn1" value="2"> Button 2<br>
  <hr>

  <button id="btn1">Check Button 1</button>
  <button id="btn2">Check Button 2</button>

  <script src="https://code.jquery.com/jquery-3.5.0.js"></script>
  <script>
    $(document).ready(function() {
      // Check radio button 1
      $("#btn1").click(function() {
        $("input[name='btn1'][value='1']").prop("checked", true);
      });

      // Check radio button 2
      $("#btn2").click(function() {
        $("input[name='btn1'][value='2']").prop("checked", true);
      });
    });
  </script>
</body>

</html>Output:

2. Check Radio Button using attr() method
Another way to check radio button using jQuery is by using the attr() method.
It works similar to the prop() method, you can pass the checked property to the attr() method and set its value to true.
Here is a working example of checking radio button using attr() method:
Example
<!DOCTYPE html>
<html>

<head>
  <meta charset="UTF-8">
  <title>jQuery radio button checked: Example 2</title>
</head>

<body>
  <h1>Check radio button using <code>attr()</code> method in jQuery</h1>
  <input type="radio" name="btn2" value="1"> Button 1<br>
  <input type="radio" name="btn2" value="2"> Button 2<br>
  <hr>

  <button id="btn3">Check Button 1</button>
  <button id="btn4">Check Button 2</button>

  <script src="https://code.jquery.com/jquery-3.5.0.js"></script>
  <script>
    $(document).ready(function() {
      // Check radio button 1
      $("#btn3").click(function() {
        $("input[name='btn2'][value='1']").attr("checked", true);
      });

      // Check radio button 2
      $("#btn4").click(function() {
        $("input[name='btn2'][value='2']").attr("checked", true);
      });
    });
  </script>
</body>

</html>Output:

Checking the Status of Radio Button
Now that we have learned how to check radio button using jQuery, let's see how to check the status of a radio button.
To check the status of a radio button, we can use the is() method.
Pass the :checked property to the is() method and it will return true if the radio button is checked, otherwise it will return false.
Example
<!DOCTYPE html>
<html>

<head>
  <meta charset="UTF-8">
  <title>jQuery radio button checked: Example 3</title>
</head>

<body>
  <h1>Check radio button status using <code>is()</code> method in jQuery</h1>
  <input type="radio" name="btn1" id="btn1" value="1" checked> Button 1<br>
  <input type="radio" name="btn2" id="btn2" value="2"> Button 2<br>
  <hr>

  <button id="btn5">Check Status of input 1</button>
  <button id="btn6">Check Status of input 2</button>

  <script src="https://code.jquery.com/jquery-3.5.0.js"></script>
  <script>
    $(document).ready(function () {
      // Check status of radio button 1
      $("#btn5").click(function () {
        if ($("#btn1").is(":checked")) {
          alert("Button 1 is checked.");
        } else {
          alert("Button 1 is not checked.");
        }
      });

      // Check status of radio button 2
      $("#btn6").click(function () {
        if ($("#btn2").is(":checked")) {
          alert("Button 2 is checked.");
        } else {
          alert("Button 2 is not checked.");
        }
      });
    });
  </script>
</body>

</html>Conclusion
You have learner how to check radio button using jQuery in 2 different ways, prop() and attr() method.
Also, you have learned how to check the status of a radio button using is() method. Understanding these methods will help you to handle radio buttons using jQuery effectively.
Happy coding! 😊
