Add Style Using Javascript
One of the many uses of javascript is in styling HTML document dynamically. Javascript can add or remove CSS properties to any element either directly or by triggering some event.
Using javascript you can set almost all CSS properties to the elements like color, background, border, animation, font style, text alignments, width, height, padding, position and so on.
You can use javascript to directly set a style on an element and you can also use it to add or remove classes from the elements which will add or remove a set of CSS style to the element.
Note: CSS should always be preferred for the styling of elements. Only in case, we need some dynamic action we can use javascript.
In this tutorial, you will learn how to manage the styling of an element using javascript.
How to Style elements Using Javascript?
As we have seen above there are 2 different approaches to alter the style of an element using javascript.
Let's look at both of these ways in great detail.
1. JavaScript Set Style
Every element in the DOM has a style object.
This style object is also one of the properties of the element. The style property returns a CSSStyleDeclaration object, which represents an element's style attribute.
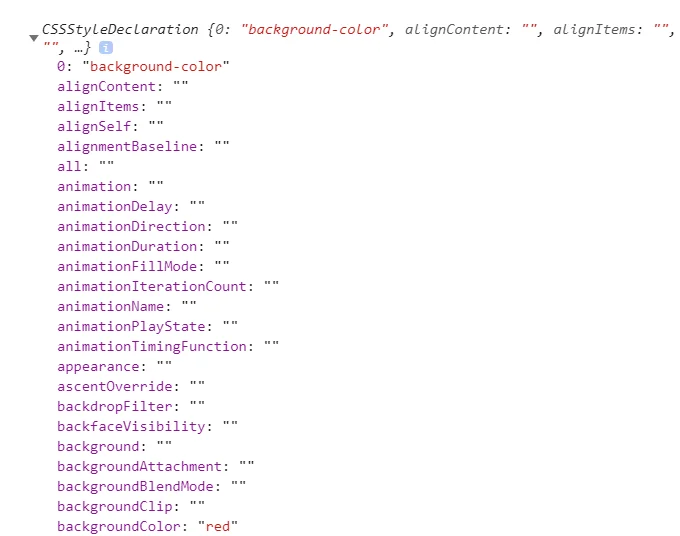
You can see from the above picture, style object provide all CSS properties which you can get or set using this object.
To Change style of an elements:
- Select an element (example - by using
getElementById) - Then access the
styleproperty of that element. - Then set the CSS property of that element using
styleproperty.
Syntax:
element.style.css_property = "value";Let's change the color of an element with "id1" in example below.
In the above example, you set the new style to the paragraph directly using javascript, but you can also set the new style to any element when an event is fired. Events could be anything like page load, button click, mouse move, page scroll etc.
Let's see an example which uses the click event to change the color of a paragraph.
const element = document.getElementById("id1");
function changeColor(color) {
  element.style.color = color;
}Changing CSS property having hyphen
There are many CSS properties that have a hyphen in its name, example background-color, border-radius,margin-top, etc and javascript simply does not accept hyphen in a variable name, function name or in the property name
Now suppose you want to set background-color using javascript, then what should you do?
To specify such CSS property simply remove the hyphen from the property name and convert the property in camelcase. Example 'background-color' => backgroundColor
Here is a list of CSS property with a hyphen and how to use it in javascript.
| Property name in CSS | To | in Javascript |
|---|---|---|
| background-color | => | backgroundColor |
| background-image | => | backgroundImage |
| border-bottom | => | borderBottom |
| border-top | => | borderTop |
| box-shadow | => | boxShadow |
| margin-top | => | marginTop |
| font-family | => | fontFamily |
| line-height | => | lineHeight |
| and so on... | ||
Let's see some examples.
const body = document.body;
body.style.backgroundColor = "teal";Adding border property to the element
const element = document.getElementById("para");
element.style.border = "3px";
element.style.borderStyle = "Solid";
element.style.borderColor = "blue";Special case: The CSS property float is used as cssFloat when using with javascript because the word float is a reserved word in javascript.
2. Javascript Add Class To Element
Another way to add or remove CSS style from an element is by adding and removing CSS classes from the element.
In JavaScript, we have className and classList properties to handle classes.
- className: It returns all the classes present in the element in form of string
- classList: It returns
DOMTokenList, which contains various methods to handle classes in an element
You can also add or remove classes using className property but you have to do a bunch of trickling with returns string, which is not a fun way to handle classes.
But, classList property comes with bunch of methods to handle classes. Here are few methods to modify classes:
I. adding class in javascript
To add a class value to an element use add method on an element via classList property of the element.
You can add single or multiple classes to the element at once. To add multiple classes provide a class name in the add method separated by a comma.
Adding a single class to the element.
element.classList.add('size');Adding multiple classes to the element.
element.classList.add('padding', 'color');Here is a working example:
const element = document.querySelector('p');

function addSize() {
  element.classList.add('size');
}
function addPaddingAndColor() {
  element.classList.add('padding', 'color');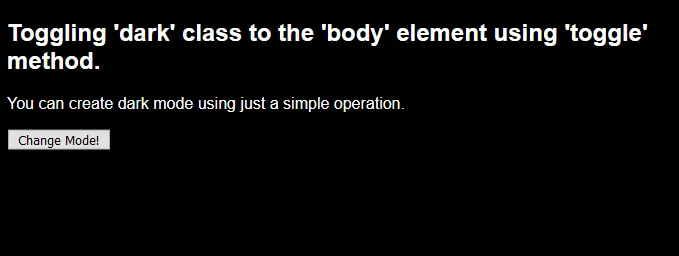
}II. toggle class in javascript
The toggle method of classList property toggle a class value from the element means if the class is present in the element then it removes the class and if the class is not present in the element then it adds the class to the element.
Below is an example of the dark and white mode using the toggle method.
const element = document.querySelector('body');

function toggleClass() {
  element.classList.toggle('dark');
}III. remove class in javascript
To remove a class from an element use remove method of classList property.
You can remove single or multiple classes at once from the element.
Removing single class:
element.classList.remove('size');Removing multiple class:
element.classList.remove('padding', 'color');Here is a working example:
const element = document.querySelector('p');

function removeSize() {
  element.classList.remove('size');
}
function removePaddingAndColor() {
  element.classList.remove('padding', 'color');
}IV. replace class in javascript
To replace a class with another class in an element use replace() method with classList API.
The replace method takes two arguments, the first argument is old class and the second argument is a new class.
Replacing a class with another class:
element.classList.replace('blue', 'red');Here is a working example:
const element = document.querySelector('p');

function red() {
  element.classList.replace('blue', 'red');
}
function blue() {
  element.classList.replace('red', 'blue');
}Creating Animation Using Javascript
Using Above javascript style properties we can create cool animation. With these only limits in creating animation is our imagination.
Let's create a simple animation of a moving ball.
<!DOCTYPE html>
<html lang="en">

<head>
  <title>Javascript - DOM Animation Ball</title>
  <style>
    .container {
      width: 600px;
      height: 200px;
      background-color: steelblue;
      border: 2px solid gray;
      position: relative;
    }

    .ball {
      background-color: tomato;
      width: 50px;
      height: 50px;
      border: 1px solid sienna;
      position: absolute;
      border-radius: 50%;
      margin: 0;
    }
  </style>
</head>

<body>
  <h2>Creating a Moving ball using javascript.</h2>

  <div class="container">
    <p class="ball"></p>
  </div>
  <button onclick="jump()">Jump</button>
  <script>
    function jump() {
      setInterval(go, 10);
    }
    var ball = document.querySelector('.ball');
    var xStart = 0;
    var yStart = 0;
    var xEnd = 150;
    var yEnd = 550;
    function go() {
      if (xStart < xEnd)
        xStart++;
      else
        xStart = 0;
      if (yStart < yEnd)
        yStart++;
      else
        xStart = 0;

      ball.style.top = xStart + "px";
      ball.style.left = yStart + "px";
    }
  </script>
</body >

</html >Conclusion
Styling element using Javascript gives you the power to change the style of an element dynamically. This can help you build cool animations, features, and effects.
But, you should always prefer CSS for styling elements. Javascript should only be used when you need some dynamic action.